











English


Gameplay
How to Play Infernal Hordes in Diablo 4




Infernal Hordes is the one Diablo 4 activity I keep coming back to no matter what the season throws at me. It is a wave survival mode, permanent now, and it rewards speed over luck. I have run it hundreds of times across seasons, and the same two mistakes keep showing up. Most players leave gold on the table in there, and it has nothing to do with speed. They pick the wrong offerings and spend their Aether wrong. Fix those two things and the mode pays for everything else.
Getting Started Is the Easy Part
Unlocking Infernal Hordes is not the hard part. You reach Torment I, which takes level 60 and a tier 20 Pit clear, and the "Eyes of the Enemy" priority quest appears in Zarbinzet, Hawezar. Run through it once and the mode lives on your map forever, on both seasonal and Eternal characters.
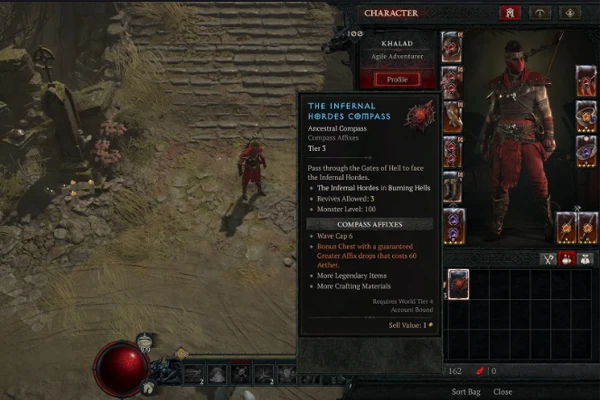
The item you actually care about is the Infernal Compass. It works like a Nightmare Dungeon Sigil, but instead of quality it has a tier from 1 to 8. You use it to drop into the arena, and the tier decides how many waves you fight. Tiers 1 through 3 are six waves, tiers 4 and 5 are seven, tier 6 is eight, tier 7 is nine, and tier 8 is ten. Higher tiers also ramp up enemy difficulty and rewards, so the ten-wave compasses are the longest runs and the most profitable. More waves means more chances to stack the good stuff, but also a longer run, and that tradeoff matters more than most players think.
Burning Aether Is the Whole Game
Everything in Infernal Hordes runs on Burning Aether. It is the currency you earn during the waves and spend after the boss dies.
You earn it from a handful of places:
- Killing Aether Fiends and Aether Lords.
- Destroying the Aetheric Masses that spawn in packs.
- Destroying Soulspires when they are worth your time.
- Picking offerings that boost all of the above.
The trick is that most of it does not come from killing things. It comes from the offerings you pick between waves, because those multiply everything you kill for the rest of the run. A good offering picked on wave two pays you on every wave after it. That is the whole reason a run can end at a few hundred Aether or a few thousand.
Which Offerings to Pick
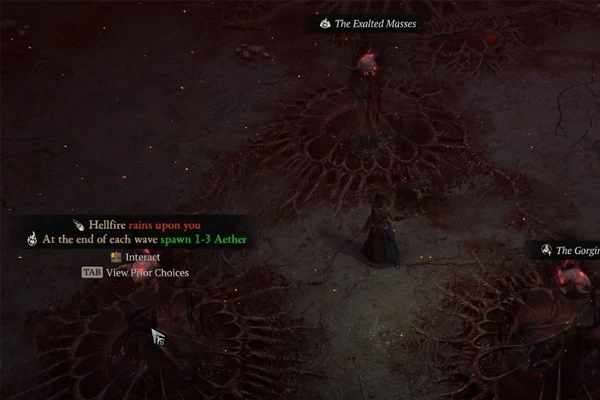
Between waves you get a choice of three Infernal Offers, and each one is a buff tied to a cost. Some make enemies hit harder, some make more of them spawn, and the right ones are worth every bit of trouble.
The ones that actually print Aether are the fiend and lord packages. "The Fiendish Legion" replaces elites with Aether Fiends, "The Colossal Fiends" turns those fiends into Aether Lords worth triple, and "The Ruthless Lords" adds more Aether on top. Stack those and every pack you kill is a jackpot. "The Exalted Hordes" is another one worth taking early, since it spawns events faster. Aether Goblins sound tempting, but they run away, so only take them if you can kill fast. The Soulspire and Mass picks are the weak ones, the ones you take when the other two options are worse. Pick for Aether early and the difficulty does not matter because by wave six you are already ahead.
Six Waves or Ten
Once you can clear a run without dying, the wave count becomes a real decision.
Six-wave runs are the speed play. You bank your Aether, kill the Fell Council, and get out in under ten minutes. That is the right call when you are farming materials and just want the fastest cycle. Eight and ten-wave runs are the loot play, because more waves means more offering picks, and the Aether compounds. A ten-wave run with good fiend offerings will dwarf two six-wave runs. The honest answer is that it depends on your build speed. If you are one-shotting packs, run ten. If every wave is a fight, run six and do more of them.
The Fell Council is three bosses at once. Focus one down instead of spreading damage, and hold your cooldowns for the last one standing.
Spending Aether Without Wasting It
The last mistake is the easiest one to make, and it happens after the boss is already dead.
At the end you spend Burning Aether on Spoils of Hell chests. Equipment, Materials, Gold, and Greater Equipment. Each chest costs a fixed amount of Aether per open, so you can click it again and again until your Aether is gone. The Greater Equipment chest is the expensive one, a few hundred Aether for a guaranteed Ancestral item with a Greater Affix, so take that first if you want gear. The Materials chest feeds your masterworking, and the Gold chest is a straight lump for enchanting rerolls. The one rule that never changes is that Aether does not carry over between runs. Whatever you do not spend before you leave is gone, so do not hoard it. Decide what the run is for before the first wave, not after the last.


