












English


Gameplay
Diablo 4 Tempering Guide: How to Add the Right Affixes to Your Gear




Tempering is the step most players skip, and it's usually the reason their build underperforms even with good gear. A perfectly rolled item without the right tempered affix is still half a build.
The system used to be punishing, with a hard limit on rerolls that could brick an item forever. That changed a while back, and the current version is far kinder. Here's how tempering works now and how to use it well.
What Tempering Actually Does
Tempering is the Blacksmith system that lets you add a custom affix to a piece of gear, and it's the difference between a generic drop and a build-specific one.
You pick the affix you want from a Temper Manual, pay a bit of material, and the affix gets stamped onto the item. Only Rare or higher gear can be tempered, and the affix can't be re-rolled at the Occultist. It does get boosted by Masterworking later, so the two systems chain together.
The nice part is that the same tempered affix on two different pieces stacks. If a build lives on cooldown reduction, you can temper it onto both an amulet and a ring and collect the bonus twice.
How Temper Manuals and the Codex Work
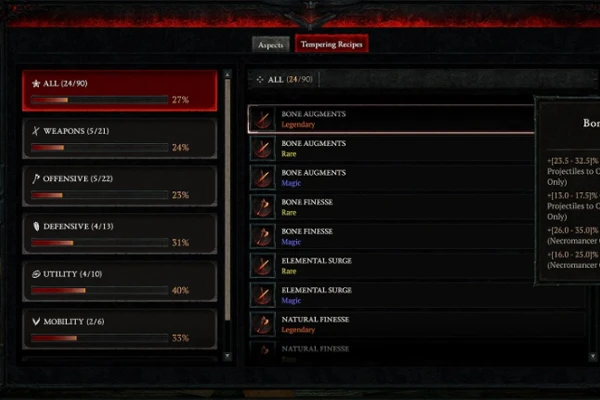
Temper Manuals are the recipe items behind the whole system, and learning them is a one-time thing.
Right-click a Manual and it gets added to your Codex of Power permanently. From then on you can apply that affix at the Blacksmith as many times as you want. Manuals come in Magic, Rare, and Legendary quality, and the rarity only changes the stat range. A Legendary manual rolls higher numbers than a Magic one with the same affix name.
Manuals start dropping near level 30 and show up more often at higher difficulty. The best farming spots are Tree of Whispers caches, Helltide chests, Nightmare Dungeon bosses, and the Undercity. One trick worth knowing is saving Whispers caches on your main and opening them on an alt, which is a fast way to collect manuals for a second class.
The Six Temper Categories
Every temper falls into one of six categories, and each category only fits certain gear slots:
- Weapons covers weapon tempers, the main damage output.
- Offensive fits weapons, amulets, gloves, and rings, adding damage and crit effects.
- Defensive fits shields, helms, chest, pants, and amulets, for survivability.
- Utility fits most armor slots, with things like cooldown and crowd control effects.
- Mobility fits amulets and boots, for movement speed and related stats.
- Resource fits amulets and rings, for the stats that keep your build running.
Amulets are the flexible slot because they can take all six categories. When you're not sure where to put a temper, the amulet is usually where it fits.
How to Temper and Reroll Without Bricking
The old fear was bricking an item by running out of rerolls. That's mostly gone now, but the system still has a few rules worth knowing:
Pick the exact affix. You choose which temper you want, and only the value rolls randomly.
Mind the base charges. Legendary gear starts with three temper charges, plus one more per Greater Affix, so the first rolls come free.
Reroll with Scrolls of Restoration. Each scroll restores one charge, and there's no cap on how many you use, so a bad roll never bricks the item.
Chase a Greater Affix. A tempered affix can land as a GA, pushing the stat past its normal maximum, so keep a stack of scrolls on hand.
Scrolls come from Infernal Hordes, where you spend Burning Aether on the Spoils of Greater Equipment, and from the Dark Citadel, where Citadel Coins buy them. Farm a stack first, then roll for the temper you actually want.
Which Tempers Are Worth Chasing
The biggest mistake is chasing big additive numbers when the real power is in multipliers.
A temper that says "Chance to Deal Double Damage" or "Chance to Cast Twice" usually beats a flat crit or damage boost, because it multiplies your whole output instead of adding to it. Cooldown reduction and the build-defining multipliers are the tempers that actually change how a build plays. Additive damage stats like generic crit damage are fine for finishing a piece, but they're not worth burning rerolls on.
The habit that separates good gear from great gear is simple. Temper for the multiplier first, then let Masterworking push the numbers higher. Get the right affix stamped, and the rest is just grinding materials.


