












English


Gameplay
ARC Raiders Raider Hatch Key: How to Get and Use It?




You're crouched behind cover near the extraction point, your backpack stuffed with top-tier attachments from a full raid of scavenging, and you can hear footsteps in the distance — more than one squad's worth. Anyone who's played ARC Raiders knows exactly how sweaty your palms get in that moment. Regular extraction points are visible to every player on the map. You fire the extraction signal, then you have to hold your ground for several dozen seconds, never knowing if someone's about to roll up on you. The Hatch Key exists precisely for moments like this. It's not a tool for getting more stuff. It's the insurance policy that lets you keep what you've already found and get out alive. But keys are not infinite. Every single one is hard-earned, and knowing when to burn one and when to save it is the single most underrated skill in ARC Raiders.
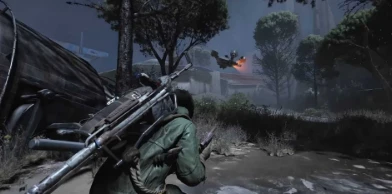
What the key actually is and how to get one?
A lot of new players assume the key unlocks some kind of hidden treasure room. In reality, its function is far more practical — it opens one of the underground hatches scattered across the map, and once inside, you and your squad can extract directly from that point, bypassing the regular extraction zones entirely. But because it's so powerful, getting your hands on one takes deliberate effort.
- The most reliable source is buying directly from Safekeeper Shani at the shelter. She refreshes her inventory on a regular cycle, and the Hatch Key is one of her permanent stock options — but it's not cheap, and the quantity available per restock is limited. The scrap currency you earn from looting across raids is never wasted when spent on a key, because what the key protects is the value of everything else in your bag.
- The second option is crafting one yourself at the Utility Station. It requires advanced electronic components and sensors. If you make a habit of keeping those materials when you find them during scavenging runs, saving up enough for a key isn't too difficult. That said, the materials take up backpack space, so you have to weigh whether they're better used for crafting a key or for trading toward something else.
- Completing specific main or side missions also rewards keys. This source is reliable but limited — one-off fixed rewards, not something you can farm repeatedly. Keys earned from missions are best treated as an emergency reserve. Don't burn them the moment you get them.
None of these three methods relies on luck or random drops. That means your access to Hatch Keys is directly tied to how much time you put into the game. It's not a surprise you stumble across by chance. It's a strategic resource you actively stockpile. Once you internalize that, you start treating every key decision with the weight it deserves.
How to use a hatch so you actually get your key's worth?
The function itself takes one sentence to explain: walk up to any Hatch, press the interact key, go down, confirm extraction at the terminal. But what determines whether a key was worth spending has nothing to do with that sequence — it's the judgment you make in the few seconds before you press the button.
- The opening animation is not fast. Your character crouches down to work the hatch lock, and the whole interaction lasts several seconds. During that entire window, you cannot move and you cannot fight back. That means if there's an enemy nearby or a recon drone circling overhead, you are a stationary target the moment you start opening it. Scan your surroundings before committing. This habit matters more than any mechanical skill in the game.
- Hatch locations on the map are fixed. Each map has roughly five to seven usable hatch positions. Once you've memorized them, your extraction route is no longer held hostage by the two or three regular extraction points the map gives everyone. Especially when regular extract points are being camped, circling around to a hatch on the opposite side of the map and vanishing without a trace is the most satisfying move in the game. They're still waiting for you to show up. You're already back in your stash.
- The hatch isn't just for you. Squadmates can follow you in and extract together. One key, one opening, and the whole team gets out safe. This is especially valuable when someone on the squad is low on HP or completely out of ammo. Compared to everyone limping toward a regular extract point and then getting wiped during the signal countdown, trading one key for a full squad extraction is value you don't even need to do the math on.
The advice about keeping the key in your secure container barely needs saying, but a lot of people still don't do it — they get a key and instinctively leave it in their regular backpack, then die and lose it. One of your secure container's two slots should always hold a Hatch Key. As long as the key is in the secure container, even if you go down right in front of the hatch door, it's still with you next raid.
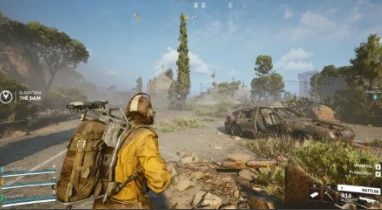
When you should fight the urge and not use it?
When you've got a key in your pocket, the biggest temptation is to feel invincible — grab a few things, head to a hatch, and bail. But that habit will drain you dry over time. Keys are consumables. Every single one represents time you spent earning it. Wasting one on an unnecessary extraction is literally burning your own time.
There are really only three situations that justify spending a key: you're carrying high-value loot you absolutely cannot afford to lose, your HP or overall condition is too compromised for a safe regular extraction, or a regular extract point is clearly being camped by other players. Outside of those scenarios — even if you're one piece short of completing a full loadout — if you're healthy and the regular extract point is quiet, just take the normal exit. Keys don't expire in your stash. Skip it this raid, use it next raid. Skip it today, use it a month from now. But burn one carelessly, and replacing it won't be quick.
There's another situation that gets people worked up: a squadmate asks you to pop a hatch and bring everyone along. Helping your team is fine. But if the whole squad is in decent shape and the regular extract point isn't far, spending a key in that moment is a team-wide resource waste. It's worth hashing out clear standards with your squad ahead of time — under what conditions you're willing to burn a key, and under what conditions everyone just runs to the regular extract. Have that conversation once, and every raid after it runs smoother.
The players who really know what they're doing in ARC Raiders aren't the ones with the best gear. They're the ones who are best at getting their gear out alive. The Hatch Key is the most direct expression of that ability. It doesn't raise the ceiling on what you can earn in a single raid. But it raises the floor on what you keep by more than a full tier. One key is one extraction where you don't have to care what anyone else on the map is doing. In an extraction looter-shooter, that's worth more than any gold weapon. Learning to stockpile keys, learning to judge when to use them, learning to hold back even when the urge is screaming at you to burn one — that's the path from ordinary scavenger to seasoned Raider.


