












English


Guide
ARC Raiders Combat Guide




When I first started playing ARC Raiders, my default response to seeing an ARC machine was always the same: run. It wasn't cowardice — I genuinely couldn't kill them. Not enough ammo, terrible positioning, health bar evaporating, and all three of those things at once meant a free trip back to the lobby. After a hundred-plus hours, I slowly graduated from "hide from everything" to "scan the situation first, then decide." There are so many little things this game never tells you about combat — lessons you only learn by dying. And here's the thing I eventually realized: combat in this game isn't really about aim. It's about how well you know your weapon, how well you read the machine in front of you, and how honestly you judge whether you can make it to extraction alive. Here are the fighting habits and strategies I've tested and retested — hopefully they'll save you a few deaths.
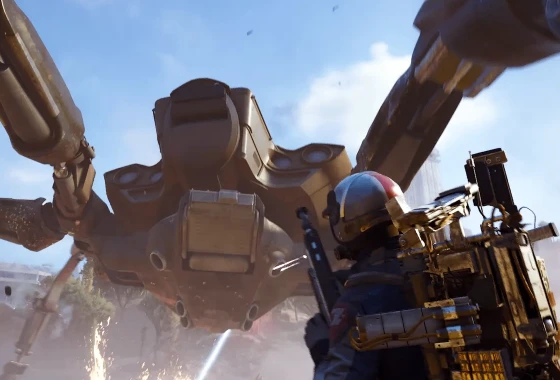
Pick Your Weapon Based on What You're Fighting, Not the Stat Sheet
ARC Raiders' weapon system has a particularly deceptive quality — big numbers on paper do not translate to effectiveness in the field. Some guns tear up target dummies at the firing range but turn useless the moment a Firefly or Comet shows up in Buried City, spraying bullets into empty air while the machine teleports to a different zip code. A weapon's real value depends entirely on what kind of enemy you're about to face — the core logic of weapon selection isn't about comparing stats, it's about whether this gun can consistently land damage on the map and playstyle you're running.
After a lot of swapping and testing across different scenarios, here are the weapon principles I run through before every drop:
- High rate of fire beats high damage per shot against mobile ARCs. Enemies like Firefly and Comet dart around constantly — slow, heavy-hitting weapons whiff more than they connect. High-ROF rifles and SMGs track their movement better, and the accumulated damage over a full magazine usually outpaces what a single-shot cannon can do when half those shots miss.
- Against heavy armor ARCs, bring armor-piercing rounds or high single-shot damage. Something like an Anvil has frontal armor so thick that shooting the body is basically throwing pebbles at a tank. Either load AP rounds and aim for weak spots, or use something like the Ferro to drill concentrated damage into the head or exhaust vents.
- Don't obsess over gold rarity — a blue gun with the right ammo clears just fine. Weapon rarity and combat performance are not a straight line. A blue-tier rifle loaded with AP or high-explosive rounds will outclass a gold gun running standard ammo nine times out of ten. Ammo type matters more than the gun itself, and honestly, plenty of players never figure this out before they quit.
Movement Wins Fights — Your Positioning Is Worth More Than Your Trigger Finger
The cover and movement mechanics in this game are surprisingly solid, but new players tend to treat it like a shooter — stand still, dump damage, and only remember to move when they're already on the ground. Here's an ARC AI behavior that changes everything once you understand it: ARC enemies prioritize targets that stay in their line of sight continuously, not the target dealing the most damage. This means if you break line of sight frequently using cover, you can completely disrupt their attack rhythm — the core of combat movement in ARC Raiders can be boiled down to three things: break line of sight, manage distance, and find the flank.
Once these movement habits become second nature, your survival rate improves in ways you can actually feel:
- Change cover after every magazine. Don't get greedy with damage output — the moment your mag runs dry, relocate. ARC targeting has a brief "re-acquisition" delay when you change positions, and that gap is your best window to reload and reassess. Firing from the same spot for more than ten seconds is basically sending the ARC a written invitation.
- When outnumbered, use one ARC as a body shield against the others. Large ARC units physically block incoming fire from their allies. If you get caught between two or more machines, don't stand in the open trading shots — immediately circle to the flank or rear of one of them and let its body eat the incoming fire from the other. This trick is especially clutch against Comet plus Firefly combos.
- Going upstairs is safer than running far. ARC vertical pursuit is noticeably weaker than horizontal chase. If you make contact in Buried City's mall or office zones, running up two flights of stairs will lose pursuers more reliably than sprinting two blocks down the street. Once on the roof, zip-line or jump across to another building, and the ARC basically can't follow.
Learn Every Machine's Weak Points — Brute Force Is a Waste of Ammo
The enemy roster in ARC Raiders isn't massive, but every type has distinct weak point locations, attack patterns, and AI tendencies. The most common new-player mistake is treating every ARC the same way — aim for the head, shoot, run. But some ARCs don't even have their weak point on the head. You can dump half a magazine into the skull and do less damage than three rounds into an exhaust port — every ARC type has its own "kill switch," and once you know where it is, the fight becomes dramatically easier.
You don't need to memorize every variant — just lock in these common ones and you'll be fine for most encounters:
- Firefly - shoot the wing joints. Firefly's biggest strength is aerial mobility, but when it hovers, the base of its wings exposes a glowing node. Hit that and it staggers to the ground, giving you a real damage window. Chasing it around plinking body shots is the least efficient approach possible.
- Comet - break the leg armor first. Comet moves fast, and fighting it head-on is asking to get shredded. Focus fire on one leg until the armor breaks — its speed drops off a cliff after that, and from there it's target practice. High-explosive rounds make this even faster.
- Anvil - hit the back-mounted heat vent. Anvil's frontal armor is absurdly tanky. Shooting it from the front is pouring bullets down a hole. Circle around to the exposed heat vent on its back and the damage multiplier makes the fight go completely differently. Solo flanking can be awkward, but smoke grenades or vertical terrain make it much more manageable.

Adrenaline Shots — Don't Hoard Them, Don't Chug Them Either
Adrenaline shots are genuinely your second health bar in ARC Raiders, but players tend to land on one of two extremes: either they save every shot "for later" and die with three in the inventory, or they panic-pop all of them the moment a fight starts and still go down. Timing matters more than quantity — too early and it's wasted, too late and you're already dead. Adrenaline rhythm is one of the most overlooked but most valuable combat skills in the entire game.
Here are a few lessons about adrenaline that I paid for in lost gear:
- Inject before the fight starts, not when you're already dying. Adrenaline isn't instant — it heals over time. If you wait until your health bar is a sliver, one stray round during the regen window finishes you off. The right move is to inject before you enter the engagement zone, effectively giving yourself an extra health bar from the jump.
- Pair adrenaline with cover-based reloads for the most stable combat rhythm. One injection lasts long enough for about two full magazines. The loop goes like this: inject, dump one mag, switch cover while reloading, dump the second mag, then assess whether to keep fighting or disengage. Once this cycle feels natural, most encounters become manageable.
- Always save one shot for the extraction run. The most devastating feeling isn't losing a fight — it's winning the fight, looting something great, and then getting picked off by a random patrol on the way to extract. Keep one adrenaline shot in reserve for the exit route. That habit alone is worth more than any fancy combat technique.
ARC Raiders combat isn't hard to pick up, but the gap between "can win fights" and "wins fights easily" is filled with hundreds of deaths worth of muscle memory. Weapon selection, movement habits, weak point knowledge, and adrenaline timing — none of these are taught in any tutorial, and every single one directly determines whether you extract or bleed out. At the end of the day, combat in this game isn't about who has the better aim. It's about who makes fewer mistakes.


