












English


Gameplay
Lineage Classic Monster Grinding Routes: What Works on a Live Server




I've lost count of how many grinding route guides I've read that sound like they were written by someone staring at a map, not someone who's actually spent a Saturday night cycling through Dragon Valley spawns while watching for PK alerts. The routes that look perfect on paper (high mob density, good drops, short run from town) are the same ones where you'll spend half your session fighting other players for pulls. That's the thing most guides skip: you're never the only person on the server, and the "best" route at 3 AM is not the best route at 8 PM. What follows isn't a database dump of coordinates. It's a set of routes that hold up under real server conditions, based on way too many hours actually running them.
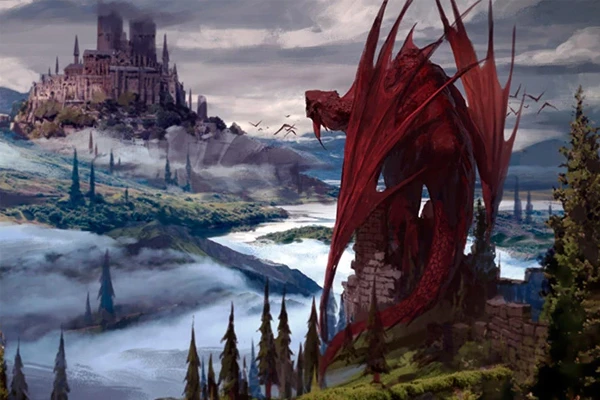
Talking Island Has More Than the Boat to Gludio
Everyone wants off Talking Island as fast as possible. Hit level 13, grab the boat, never look back. I did that on my first character too. Then I came back on an alt and realized I'd skipped half the content.
The skeleton fields north of town get all the attention, and they're fine if the server is quiet. The werewolf plains to the east are the backup option when skeletons are camped. But the northwest corner of the island has a zombie cluster around an abandoned farmhouse that almost nobody touches, because it's a 90-second run from the nearest teleport point. On a busy server, those 90 seconds buy you an hour of uncontested pulls.
A few spots worth knowing:
- Northwest zombie field near the abandoned farmhouse: tight respawns, almost zero traffic, and the zombies drop bone pieces that actually move on the Gludio market
- Eastern beach goblin stretch: low XP per kill but they drop fast enough that you can chain-pull without stopping, decent for burning through the last half-level before the boat
- Small cave above the werewolf plains: awkward layout means most players skip it, but three ghoul spawns inside respawn at a solid rate and nobody bothers checking them
The hidden value of Talking Island isn't the XP. It's the low-level crafting materials. Bone pieces, leather scraps, scroll fragments. These don't get farmed heavily later because everyone's moved on to higher-level maps, but the demand never goes away. A few hours of island grinding at level 12 can fund your Gludio weapon without touching your main's adena. That's something most players figure out on their third or fourth character, not their first.
Gludio Dungeon vs. Ant Nest: Pick One
Around level 25, you hit the first real fork in the road. Gludio Dungeon or the Ant Nest. Both will carry you to level 40 and beyond, but they reward completely different approaches. The players I've seen struggle the most in this range are the ones bouncing between the two instead of learning one route inside out.
Gludio Dungeon is the safer bet. Seven floors, predictable spawn timers, tight corridors that funnel mobs into manageable pulls. Once you've run B2 for an hour, you can predict exactly when each skeleton room pops. That predictability makes it ideal for melee characters. The tradeoff is that everyone else knows this too, and the double-skeleton room on B2 has been contested territory since the game launched.
The Ant Nest is chaos by comparison. Maze-like tunnels, inconsistent spawns, giant soldier ants that hit hard enough to punish sloppy pulls. But the XP per hour ceiling is higher if you can handle the pace, and the drops (ant materials, the minuscule chance at Ant Queen loot) give you upside that Gludio Dungeon doesn't match.
Here's how they stack up side by side:
|
|
Gludio Dungeon |
Ant Nest |
|
Layout |
Seven floors, tight corridors |
Maze-like tunnels, wide chambers |
|
Spawns |
Predictable, timer-based |
Inconsistent, scattered |
|
Best class |
Melee, knights |
Mages (AoE), archers |
|
Risk level |
Lower, controlled pulls |
Higher, surprise patrols |
|
Drop ceiling |
Steady but unspectacular |
Higher upside (Ant Queen drops) |
|
Crowding |
B2 skeleton room heavily contested |
Spread across chambers |
What I settled on after running both:
- Gludio B2 double-skeleton room: best consistent XP on the floor, but expect serious competition during prime time
- Ant Nest soldier ant corridor (second fork from the entrance): tight density, fewer patrol spawns than the main chamber
- Gludio ghoul pit on B1 near the stairs: spawns are spread out, but circling the pit instead of camping one spot hits the same count as the skeleton room
- Ant Nest main chamber: solo only if the server is dead; otherwise bring a party or stay away
For mages with area damage, the Ant Nest is the clear winner. Mob density favors AoE, and the tunnel layout gives you natural kiting lanes. Knights and melee characters will burn fewer potions in Gludio Dungeon's controlled pulls and die less often. That potion math matters more than the XP-per-kill number printed on any stat sheet.
Surviving Dragon Valley on a Crowded Server
Dragon Valley is where the game stops being polite. You roll in around level 44 feeling unstoppable after clearing the Ant Nest, and a drake patrol hits you from behind before you reach the first real camp. I died three times in my first hour there, and every death taught me something the map labels don't tell you.
The valley isn't designed to be cleared room by room. The mobs cut off paths.
Patrols intersect in ways that turn a manageable two-pull into a four-mob mess if you're standing in the wrong spot. Once you stop thinking about "clearing" and start thinking about "navigating," the map opens up.
Routes I've had consistent results with:
- Eastern ridge from the valley mouth: hug the right wall, skip the central basin entirely (three patrol routes cross there), clear the two drake spawns at the canyon mouth, then loop back — roughly six minutes per circuit, safe for solo melee
- Central basin to highlands: party route only; the drake density in the middle is what kills most first-timers who read that a spot is "the best XP location" and didn't catch the part about needing five people
- Northern cliff path: long run from any scroll point but the bone dragon spawn at the end drops materials worth real adena; worth the trip if you can clear the salamander packs on the way without chugging potions
- Lowlands near the Giran gate: worst XP on the map and the spawns are thin, but it's almost always empty because everyone pushes deeper — solid for grinding out the last 15% of a level when a death would wipe an hour of progress
The PK risk in Dragon Valley is higher than anywhere you've been before this point. The chokepoints at the valley entrance and the bridge over the central basin are notorious. If a red name pops on your minimap, don't finish your pull. Just move. The terrain funnels you into kill boxes, and the gap between escaping and dying is one wrong turn.
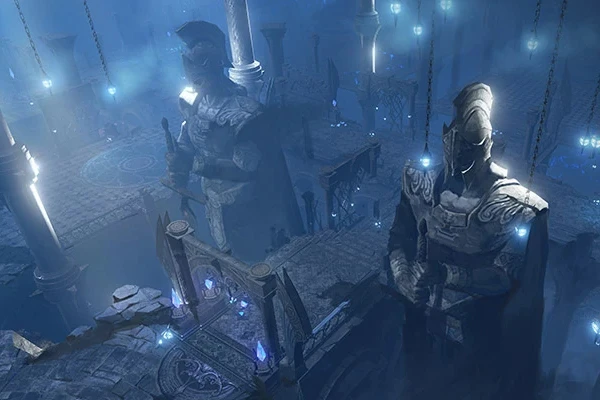
Tower of Insolence, One Floor at a Time
If Dragon Valley separates the careful players from the reckless ones, the Tower of Insolence separates the committed from everyone else. Each floor tier changes the spawn composition, and a route that works on floor 10 will get you killed on floor 15.
Floors 1 through 10 are skeleton knights and archers with occasional ghoul patrols. The density ramps around floor 7. Most solo players stop at floor 10 because there's a safe room by the stairs where you can rest between pulls. The XP holds up through level 50, though the drops are nothing special.
Floors 11 through 20 introduce death knights mixed into skeleton packs, and their magic damage surprises people who stacked physical defense. Magic resistance starts mattering here. The wraith spawns on 18 through 20 drop scrolls more frequently than anything on the lower floors, so the risk/reward math shifts noticeably.
Floors 21 through 30 demand either serious gear or a full party. The death knight concentration on floor 25 alone makes solo farming unsustainable for most builds. If you're here alone, you're chasing specific drops, not grinding XP.
Floors 31 and above: if you can farm these efficiently, you probably don't need any grinding advice. This is endgame territory where every pull checks your potion stock, your buffs, and whether your party's healer is locked in.
The sweet spot for solo players sits between floors 7 and 12. The XP curve stays reasonable through 52, the mobs are manageable with decent gear, and you're close enough to the entrance that a PK encounter doesn't mean a five-minute corpse run. Hidden safe spots exist on several floors (behind a broken pillar on floor 9, near a collapsed staircase on floor 14) where mobs can't path. You only find these by dying enough times to memorize which corners the game's pathfinding can't reach.
The Stuff Grinding Guides Don't Talk About
After running all of these routes across multiple characters, the biggest variable wasn't the map or the spawn rate or the drop table. It was the server clock.
A mediocre route at 3 AM with zero competition will give you more XP than the mathematically optimal route during prime time with three parties fighting over every room. If your schedule is flexible, figure out when your server's population dips and schedule your grinding sessions around that window. It matters more than any route choice you'll make.
Your class flips the math on every route recommendation. A knight and a mage running the same advice will have completely different experiences in the same spot. Knights want tight corridors, predictable timers, and enough space between pulls to reset. Mages want mob density above everything else because area damage efficiency scales with target count. Archers want sight lines and room to reposition. There is no universal best route. There's only the best route for what you're playing right now, on this server, at this time of day.
Potion efficiency sets the real XP ceiling. Every trip back to town to restock is a chunk of your grinding session gone. The most efficient route isn't the one with the highest XP per mob. It's the one where the highest percentage of your session is spent actually killing things instead of running back and forth to the shop. I track my sessions by adena cost versus XP gain, and a route with 10% lower XP per hour but 30% lower potion burn almost always wins out over a long session.
Some things you only learn by dying to them. The drakes in Dragon Valley punch above their level. The ghouls in Gludio are pushovers. Tower skeleton archers will wreck you if you pull more than two at once. These aren't details a route guide can really communicate. You pick them up after running the same loop fifty times, until you know exactly when to pull, when to hold, and when to just turn around and find a different spot.


