












English


Gameplay
Diablo 4 Sorcerer Ball Lightning Build: Gear Setup and Gameplay Guide




Ball Lightning Sorc has been a fan favorite since Season 2. It's been nerfed, buffed, and tweaked across seasons, but people keep coming back to it. The reason is simple: when this build clicks, it plays like nothing else in the game. The question I get most often is 'is Ball Lightning still viable?' My answer: absolutely, and when built correctly, it's more fun than most meta builds out there.
There's a catch, though. The gap between 'this feels terrible' and 'okay, now I get it' is wider on Ball Lightning than almost any other Sorc build. The transition zone frustrates a lot of players. I want to walk through the core gearing logic and the gameplay details that most guides either skip or get wrong.
This Build Plays Completely Differently From Every Other Sorc Build
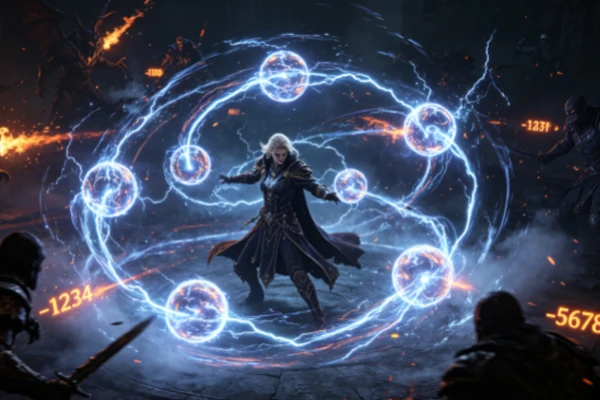
Traditional Sorc gameplay is straightforward: keep your distance, throw spells, don't let things touch you. Ball Lightning flips that script entirely. You need to be in melee range. The Gravitational Aspect changes Ball Lightning's trajectory from a straight line into an orbit around your character, which means the closer you are to enemies, the more times each ball ticks against them. This single mechanic defines the entire build — if you're still hanging back and casting from range, Ball Lightning will feel weaker than it should, to the point where you might wonder if you're playing the same class. I died constantly when I first switched to this build. It wasn't a gear problem. My brain was still playing a ranged Sorc. Every instinct told me to back away, and every time I did, my damage evaporated. Once I forced myself to push forward instead, everything changed.
Gear Priority Order
Ball Lightning gearing follows a clear logic chain: get your skills spinning first, then chase damage. Plenty of players stack crit and lightning damage right out of the gate, run out of mana after two casts, and wonder why they're hitting like a wet noodle. When you're mana-starved, the numbers on your stat sheet don't mean anything. Here's the priority order, and the sequence matters:
- Mana sustain comes first. Ball Lightning is expensive — each cast costs a significant chunk of mana, and you need to be able to fire off four or five in a row for the build to function. The Prodigy's Aspect is your best friend here: it restores mana every time you use a cooldown skill. Pair it with mana cost reduction on your rings and off-hand. Until your mana economy is sorted, nothing else matters.
- Attack speed is next. Ball Lightning's damage scales directly with the number of balls in the air. Faster attacks mean more balls. Attack speed on gloves and your main-hand weapon is non-negotiable. Pay attention to shrine buffs and potion effects that boost attack speed too — they make a noticeable difference when you stack them intentionally.
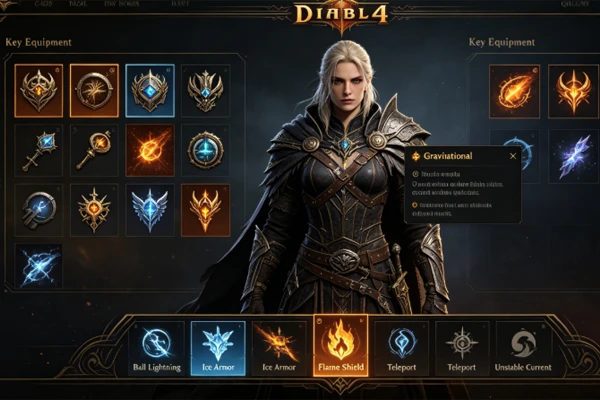
- Cooldown reduction can't be neglected. Ball Lightning leans on Ice Armor and Flame Shield for survival, and thanks to Prodigy's Aspect, Ice Armor doubles as a mana battery. The faster both skills come off cooldown, the tankier you are and the more mana you have. Helm and amulet are your best slots for stacking cooldown reduction.
- Damage stats go last. Crit chance, crit damage, lightning damage — all of these go on top once your mana, attack speed, and cooldowns are dialed in. A lot of players have gorgeous-looking stat sheets and terrible real-world damage, and the culprit is almost always the same: they're mana-gated and those impressive numbers never actually get delivered.
These four priorities sound straightforward, but in practice the 'stat sheet anxiety' is real. You see someone else's crit chance and immediately want to chase damage, then your mana and cooldowns fall behind and your actual performance gets worse. Lock in the first three layers properly and the damage takes care of itself.
Core Gear and Legendary Aspects
Gravitational Aspect is the soul of this build. Without it, Ball Lightning travels in a straight line and the damage window is a single pass — underwhelming at best. With it, the balls orbit around you, and that damage window shifts from a graze to continuous shredding. The difference is night and day. Prodigy's Aspect is your mana engine and you can't skip it — socket it on a ring, and every time you pop Ice Armor or Flame Shield, you get a chunk of mana back. With enough cooldown reduction, Ice Armor essentially becomes a mana potion on a short timer. For uniques, Tal Rasha's Iridescent Loop is a natural fit for this build. Its mechanic grants stacking damage bonuses for using different elemental types, and Ball Lightning naturally cycles through lightning, fire (Flame Shield), and cold (Ice Armor) without any extra effort. Tibault's Will deserves a mention too — it gives a damage boost and resource refund whenever you become Unstoppable. Flame Shield reliably triggers Unstoppable and lines up perfectly with Ball Lightning's skill rotation. The more often you're popping Flame Shield in high-tier content, the more value you squeeze out of Tibault's.
Gameplay Details Most People Overlook
When your gear is right, Ball Lightning's gameplay loop isn't complicated. But there are three things I've watched people consistently do wrong:
- Don't dump all your balls the moment you enter a fight. Teleport in, pop Ice Armor, confirm your positioning, then start casting. If you start spamming before your feet are planted, you'll eat a ground effect, panic-Teleport out, and every ball you just cast is wasted. Mana gone, damage zero.
- Walk through enemies, not around them. Your balls are orbiting you. If you walk a tight circle around an elite pack, every single ball rolls through every single enemy. Standing still actually gives you worse damage than staying in motion. The core gameplay fantasy here isn't turret mode — it's death by a thousand orbiting cuts while you dance through the pack.
- Don't hoard Unstable Currents. This is your ultimate — it fires random lightning skills and massively boosts your attack speed. Too many players treat it like a boss-only cooldown and leave it sitting there through elite fights. The cooldown isn't that long. In high-density content, you can use it on practically every other elite pack. Use it. It doesn't earn interest sitting off cooldown.
These three details come down to one idea: Ball Lightning is about rhythm, not burst. Controlled entry, tight movement, and aggressive ultimate usage will carry you further than stacking another 20% crit damage ever will.
Who This Build Isn't For
Ball Lightning isn't for everyone, and that's fine. If you love the long-range caster fantasy — lobbing spells from across the screen — this build is going to feel wrong. It's functionally a melee character with a Sorc skin. Your effective range is shorter than most Barbarian builds. If you're coming from Ice Shards or Fireball, there's a genuine adjustment period, and not everyone enjoys crossing that gap. Single-target damage is this build's honest weakness. Against bosses, the multi-ball advantage mostly disappears — each ball only hits once per pass, and you lose the overlapping damage that makes the build shine in density. That's not a skill issue; it's baked into the mechanics. You will feel noticeably slower on dungeon bosses compared to clearing trash. One more thing that catches people off guard: maps with high movement speed modifiers. Ball Lightning moves at a fixed speed. If you're blinking around too fast, your balls are still floating somewhere behind you while you're already standing in the next pack with nothing to hit them with. Either slow your roll and let the orbit catch up, or accept that some map mods just aren't worth running with this build. All that said — if you can live with the melee playstyle and you can stomach the boss pacing, Ball Lightning is one of the few builds in Diablo 4 that genuinely feels like playing a different game. A full screen of lightning balls swirling around you while everything in your orbit melts. Nothing else in the Sorc kit delivers that feeling.


