












English


Guide
ARC Raiders Map Exploration Guide




ARC Raiders has this one thing that makes it really rough on new players — the maps are huge and the game tells you almost nothing. You drop in and you're just standing there, no idea which direction to go. My first two weeks? Basically wandering around, grabbing whatever I stumbled across, extracting with pocket change. It was pathetic. Eventually I got comfortable with Buried City, and that's when the game's map design logic finally clicked: it's not asking you to run around aimlessly. There's a "high risk, high reward" rule baked into every zone. Once you see it, your hauls can multiply overnight. Here's what I've learned from grinding Buried City over and over.
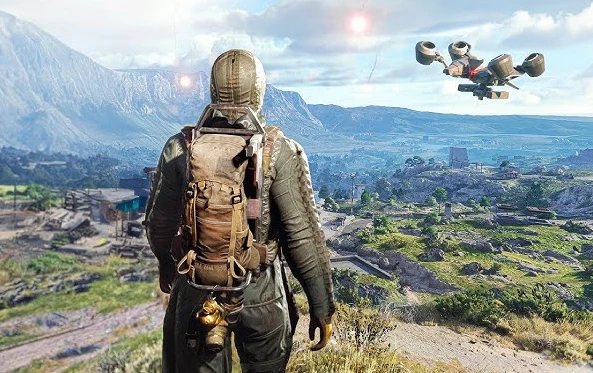
Why Buried City Is the Best Map to Learn On?
People always tell new players to start with Buried City, but barely anyone explains why. I've run over a dozen maps side by side comparing them, and here's the thing — Buried City's biggest advantage isn't raw resource density. Honestly, on a per-square-meter basis it's not even top three. What makes it stand out is how the terrain and enemy placements work for solo players —
This map gives you way more room for error than the others. It's genuinely solo-friendly.
Let me break down what that actually means on the ground:
- Tight buildings, tons of cover. Buried City is littered with rubble, broken walls, and abandoned vehicles. When an ARC patrol spots you, you've always got something to duck behind. Compare that to the open-field maps where detection equals a sprinting match you're probably going to lose — here you've actually got time to decide whether to fight or disappear.
- Resource points are evenly spread, so you're not running marathons. The key blueprint, component, and coin spawns cluster around the central and southeastern sections of the map. A single loop route covers most of the high-value spots without doubling back and wasting clock.
- Extraction points are relatively safe. Buried City's extract zones sit along the map edges in low-activity areas. Enemy spawn frequency drops off noticeably compared to the center, which means that final sprint to the chopper is way less likely to end in disaster.
That said, don't stroll in thinking the whole map is a cakewalk. The garage area up north has dense ARC patrols — if you're new, skirt around it until your gear's decent.
How to Plan an Efficient Blueprint Farming Route?
Map efficiency isn't really about how fast you move. It's about whether every turn you take is actually heading toward the next high-value point. My biggest mistake early on was grabbing everything I saw — I'd detour across half the map for a pile of common components, end up with a full backpack and zero blueprints, clock running out —
The golden rule for Buried City runs: prioritize blueprints, then coins, and only grab common parts if they're literally on your way.
Here's the solo route I've tested and settled on after a lot of trial and error:
- Enter from the southeast, beeline to the central abandoned mall. The second and third floors each have two to three fixed blueprint spawn points. It's all indoors too, so you're way less visible to ARC bots outside. Go straight upstairs when you enter — clear top to bottom, no backtracking.
- After the mall, shift to the office buildings to the west. This area has consistently high blueprint spawn rates, especially the rooftop and the underground parking garage. Take the stairs, not the elevator — elevator doors open and you never know if an ARC is standing right there.
- Finish by following the southern highway toward extraction. There are scattered loot crates along the road that a lot of players run right past on their way out. They won't always drop blueprints, but they cough up coins and components reliably enough — free money you're already running past anyway.
The whole route should take about 15 to 20 minutes. If you're going over that, you're lingering somewhere too long. Learn to skip what's not worth it. Check your earnings after each run, tweak your path, and you'll find your rhythm.
Blue Gates — The High-Reward Target Most Players Miss
The single most overlooked thing in Buried City is the Blue Gates. They don't show up on your map. You have to find them yourself. And they're not just "walk up and open" — some require puzzle-solving, some need specific items, some even have time limits. But the payoff? A single Blue Gate dropping 100K coins plus rare loot is not some urban legend —
Blue Gates are the fattest hidden resource caches in Buried City. They are absolutely worth memorizing the spawn locations for.
Here's what I can confirm after chasing these for a while:
- The locations aren't truly random. They rotate between a fixed set of candidate spots. In Buried City, Blue Gates most commonly appear in the abandoned mall basement, near the northwest subway entrance, and around the eastern substation. Once you know these zones, it costs you maybe two minutes per run to check if a gate's up. That's a cheap bet for the potential return.
- Clear the area before you start unlocking. Opening a Blue Gate takes time. If there are ARC patrols nearby and they interrupt you mid-puzzle, you're starting over. Sweep first, then open. Don't get the order backwards — I've paid for that mistake.
- Bring enough adrenaline shots. Blue Gate zones tend to be dense with enemies and elites. Adrenaline is what keeps you alive when things go sideways. I've seen players run five shots per raid when farming high-value zones — it's aggressive, but the efficiency speaks for itself. If you're new, start with three and scale up once you're comfortable.
Blue Gate payouts fluctuate — sometimes you get an average haul, sometimes one run beats three. My habit is to check every single raid. If I've got time, I go in. If not, I skip it. Don't let one mediocre drop convince you Blue Gates aren't worth it. Over the long run, they absolutely are.

How to Solo Loot Safely and Efficiently?
If you play solo in ARC Raiders, your biggest enemy isn't the ARC machines. It's greed. You don't have a teammate covering your angles or pulling aggro. You get surrounded, you lose your gear. Plain and simple. So the first rule I tell every solo player is —
The bottom line for solo looting is getting out alive. One good item in your stash beats a corpse full of dreams every single time.
A few habits that have genuinely saved my runs:
- Always keep an escape route in your head. Every time you enter a new area, note where the nearest extraction point is and how you'd get there. This habit has pulled me out of so many bad situations — especially the ones where you just picked up a solid blueprint and suddenly an ARC patrol is on top of you.
- Noise is an invisible enemy. Sprinting, firing your weapon, breaking glass — all of it pulls nearby ARC units. When you're solo, stay quiet whenever you can. If melee gets the job done, don't pull the trigger. Sometimes crouch-walking for an extra thirty seconds buys you an entire zone's worth of undisturbed looting.
- Backpack management caps your efficiency. Don't fill every slot with common parts before you extract. Leave at least five slots open for blueprints and rare items that might show up. I've watched too many people stare at a blueprint on the ground with a full inventory, and that look of pain is real.
Buried City is one of those maps that just gets better the more you run it. Your first attempt might net you a few thousand coins. Your tenth? Maybe 150K and a couple of blueprints. There's no shortcut to map knowledge — but there is a method. Find the right route, memorize the Blue Gate spots, and keep your greed in check. Every run gets more profitable than the last. For more ARC Raiders map breakdowns, patch updates, and loadout guides, check out mmom.com — the content there stays current with each update, way more reliable than outdated guides floating around.


