












English


Guide
ZZZ Pyrois Build Guide




When Version 3.0 first dropped, the hottest topic in every group chat wasn't the new map or the new story — it was whether Pyrois was actually worth building. A completely free S-Rank agent, free signature W-Engine, mindscapes you could grind out without spending a single pull. It almost sounded like the devs were throwing scraps at the player base. But once you actually invest in her and take her to full potential, you'll find this "freebie" out-damages a whole roster of limited S-Rank characters people spent real money to pull. Took me about a week to go from unlocking her to a fully built M2 with signature, and I definitely wasted materials along the way. While the memory's still fresh, here's everything you need to know in one place.
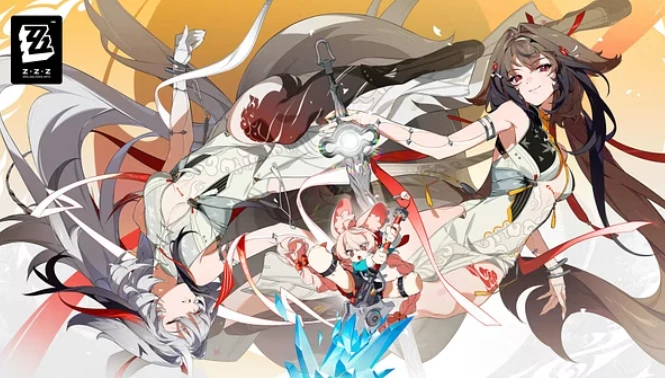
The signature W-Engine and mindscapes are all free — but that doesn't mean you can afford to be careless about them
Pyrois has an absurdly low investment ceiling. The agent herself is handed to you just by progressing the main story. Her signature W-Engine, Sol Exuvia, is unlocked by leveling up the Interboo on the Roscaelifer map. Even her first two mindscapes can be earned for free. Over the entire 3.0 patch cycle, you can walk away with an M2 signature-equipped S-Rank Attack agent without spending a single pull or a single penny. That kind of treatment has literally never happened in ZZZ's history. But precisely because it all comes so easily, a lot of people gloss over a few critical details.
- Sol Exuvia is the only W-Engine worth using on Pyrois, no debate. 30% ATK as a secondary stat, an unconditional 20% CRIT Rate from the passive, and 16% to 22% Ether RES ignore for 45 seconds after using an Ultimate or entering combat — those three bonuses combined create a gap between the signature and any alternative that isn't measured in percentages but in tiers. The best substitutes are Heartstring Nocturne or Riot Suppressor Mark VI, but even at max refinement they barely scrape 80% of what the signature delivers. Since Sol Exuvia is completely free, your only job is to not be lazy — push through the Roscaelifer main story, level up the Interboo, and claim every reward the game is trying to hand you.
- For mindscapes, M1 and M2 are both earnable for free in the current version. M1 gives you an extra 8% CRIT Rate, which immediately relaxes your stat requirements on Drive Discs. M2 makes your Lower Ultimate refund a chunk of Decibels on activation, which smooths out your entire rotation loop. The higher mindscapes don't have a complete free acquisition path yet, but M2 with signature is already more than enough to clear all current endgame content. Don't stress about the rest.
The free nature of her kit makes it tempting to write Pyrois off as a "newbie welfare character" — level her for a bit, use her as a bridge, then bench her. The reality is that an M2 signature Pyrois ranks at least top three among Ether DPS carries, and plenty of limited S-Rank characters that cost tens of thousands of Polychromes to pull struggle to match her output. Whether that holds true for your Pyrois comes down to whether you get the next two things right.
Getting the right Drive Disc set is a complete transformation — you can't guess your way through main stats and target thresholds
Drive Discs are the easiest place to mess up Pyrois' build. A lot of people farm a set where the main stats look decent enough and call it done, but Pyrois' damage multipliers don't stack the same way as most Attack agents — her CRIT, PEN, and ATK scaling follows its own logic.
- The 4-piece set is The Sky Ablaze, and there is no runner-up. The 2-piece bonus gives 10% Ether DMG, which is already free value. The real prize is the 4-piece — 30% CRIT DMG, plus an extra 10% ATK for 30 seconds after using an EX Special or Ultimate. Pyrois' entire rotation revolves around her Ultimates, so the 4-piece has near-100% uptime. Puffer Electro works as a temporary placeholder, but at equal substat quality the gap is noticeable. Don't settle for it long-term.
- Disc 4 and Disc 5 main stats are where the most mistakes get made. Disc 4 prioritizes CRIT Rate — you want around 72% on the stat screen so that with Sol Exuvia's 20% and M1's 8% you're hitting near-100% CRIT Rate in combat. If you're running M6 Nicole on the team, that threshold drops to about 57%. For Disc 5, the PEN Ratio versus Ether DMG call depends entirely on whether you're bringing a DEF shredder — with Nicole on the squad, go Ether DMG; without DEF shred, PEN Ratio takes priority. Blind-copying someone else's disc setup without thinking about your own team comp is exactly how you end up with a stat sheet that looks beautiful and performs terribly.
- Don't chase perfect substats, but CRIT Rate has significantly more weight than everything else. CRIT Rate > CRIT DMG > ATK% > PEN > Flat ATK. When your discs are still being pieced together, hit the CRIT Rate threshold first, then worry about the rest. Stacking CRIT DMG before your CRIT Rate is capped is the textbook definition of inflated numbers that don't translate to real damage.
The cruelest thing about Drive Discs is that you'll never feel like you've farmed enough. But Pyrois has one huge advantage here: she gets so much free stackable CRIT DMG from her kit (Faction Bonus +40%, Upper Ultimate +40%, The Sky Ablaze 4-piece +30% — that's over 100% free CRIT DMG combined) that your stat screen CRIT DMG can look underwhelming and it genuinely won't matter. Once you pop your rotation in combat, that number literally more than doubles.
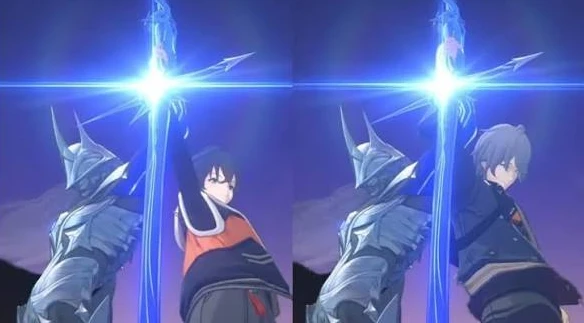
The right team doubles your damage, the right rotation doubles it again — Pyrois' ceiling lives entirely in these two things
- The way Pyrois' damage formula works means the same gear in two different players' hands can produce numbers that look like they're from different characters. Her four-branch Ultimate system is one of a kind in the entire game — hit the right sequence and it's a nuke, hit the wrong one and you've wasted it. On the team side, her Additional Ability trigger conditions mean you can't just slap together whoever you feel like.
- The team framework is non-negotiable — Pyrois plus a Stun agent plus a Support agent, because her Additional Ability only activates when the squad includes a Stun or Support character. The premium Stun slot is Dialyn. Dialyn's forced Chain Attack into Ultimate mechanic syncs with Pyrois' four-branch Ultimate rotation so cleanly it's practically a duet of back-to-back Ultimates. The fallback options are Ju Fufu or Norma — both solid. Qingyi and Trigger work too, but you'll feel the Decibel generation bottleneck. For the Support slot, Astra Yao is the most reliable option. F2P players can run Nicole without losing a beat — 40% DEF shred, 25% Ether DMG, and if you've got her at M6, an extra 15% CRIT Rate. Her quick-swap flow actually feels smoother than some S-Rank supports.
- For the rotation, the one-sentence version goes: open with Lower Ultimate → build Solar Prominence before stun → Upper Ultimate during the stun window → Right Ultimate as the finisher. Lower Ultimate, Triumphant Return, is your first action every fight — 200 seconds of 40% global DMG buff and energy regen, and you only cast it once per run. Once the enemy is stunned, pop Upper Ultimate, Total Annihilation — instant full Solar Prominence refill, plus 40% CRIT DMG against stunned enemies. Then hold basic attack for two cycles of enhanced Celestial Light to dump all your damage. Right before the stun expires, fire off Right Ultimate, Eternal Imprisonment, to trigger Totalize — that's where the 2,250% ATK damage number comes from. Don't touch Left Ultimate for now; it requires a Wind agent applying Contamination and the roster isn't there yet. Skill upgrade priority: Core Skill = Ultimate = Basic Attack > EX Special > Assist > Dodge. Core and Basic first — they're the foundation everything else scales off.
The rotation honestly just comes down to muscle memory. Spend some time on the training dummy and you'll find the rhythm. Pyrois' biggest strength as a character is that her operational logic is extremely clean — you always know what to press and when, no need to track random buff windows or guess at timing. A new player can get the loop smoothed out in two or three days. After that it's just stacking better gear and pushing higher.
Pyrois might be the most player-friendly design ZZZ has shipped all year — not because she's free, but because her free power level has zero compromises. You don't need to stress about whether you can pull her, whether the weapon banner will screw you, whether you should swipe for mindscapes. The game already gave you everything. What's left is whether you're willing to spend a week actually building her. New players who invest in her will clear every story chapter and every high-difficulty mode without hitting a wall. Veteran players adding her to an Ether team are essentially getting a T1-tier main DPS dropped in their lap for nothing. Don't let a free unit gather dust in your stash. Level her up, take her into a fight, and you'll understand the twist on the old saying — the most expensive things in this game are the free ones you were too lazy to build, because you'll never know how hard they could've carried you.


