












English


Gameplay
FC26 Best Formations and Tactics Guide




With FC27 two months away, the FC26 meta is fully settled. Every patch has dropped, every overpowered mechanic has been found and half-patched, and the player base has figured out what actually works. If you are still tweaking your setup or feeling stuck in your division, this is the right time to take a final honest look at how your tactics are holding up.
I have spent this cycle testing formations across hundreds of games. By now, FC IQ is not a new system. It has been the tactical backbone for two full cycles, and the player base has a firm grasp of how roles and tactics interact. What is still worth breaking down is what has crystallized at the top level in the late meta. Here is what has settled and why each piece matters.
The Three Formations That Have Lasted the Whole Cycle
You can make almost anything work in FC26 if you know what you are doing. But if you want a formation that gives you structure without demanding elite execution in every situation, these three have proven themselves across every patch:
- 4-2-3-1 (narrow). Still the most balanced setup in the game. Two CDMs sitting in front of the back four give you a defensive screen that holds even when your fullbacks push forward. Your three CAMs pack the center of the pitch, which is where most goals in the current meta are created through quick combinations and rebounds. The central CAM, with a Shadow Striker or Playmaker role depending on your style, is where most of your creativity comes from. Your striker ends up isolated at times, so they need to hold off a defender and finish under pressure. This formation works best if you build through the center. The lack of natural width means your fullbacks are your outlet wide, so stamina management matters more than in wider formations.
- 4-4-2 (flat). A permanent fixture of the FC meta for a reason. Two strikers up top give you a constant out ball, and two banks of four are genuinely difficult to break down when your defensive line is set correctly. The 4-4-2 has never been an overlooked formation in the FC series. It is a foundation shape that has been viable across multiple engine iterations because it covers the pitch evenly and lets you apply pressure without leaving massive gaps. The midfield pair can get isolated against formations with three central midfielders. If your opponent controls the middle of the pitch, you will struggle to build through the center and end up forcing wide passes that go nowhere.
- 4-3-2-1. The pressure-heavy option that punishes mistakes both ways. Three narrow attackers and a midfield three built around high pressing let you win the ball high up the pitch consistently. The risk is structural: your fullbacks are your only width, and if you lose possession with your midfield pushed up, you are exposed in transition. This formation has been popular in the late cycle because the player base has gotten comfortable enough with manual defending to handle the risk. If you are still working on your defensive timing, this shape will concede more goals than it creates chances.
None of these three is strictly better than the others. They map to different approaches. The 4-2-3-1 suits controlled build-up. The 4-4-2 suits balance and directness. The 4-3-2-1 suits pressure and aggression. Pick the one that matches how you actually play.
Setting Up in FC IQ: Three Independent Layers
By now, the FC IQ system has been around for two full cycles. Most players understand the basics. What still causes confusion is how the three layers interact without overlapping. FC IQ splits your setup into three independent choices: Team Tactic (attacking shape), Defensive Approach (defensive behavior), and Player Roles (individual positioning). Each layer does something separate, and the most common tactical mistakes come from treating them as if they are connected.
- Team Tactic controls what happens when you have the ball. Short Pass keeps your team compact and gives you safe passing options. It suits controlled build-up but can become predictable. Counter-Attack changes your players' forward runs when you win possession. They break forward aggressively, not because the team is sitting deeper defensively, but because the tactic tells them to transition quickly. Balanced sits between the two. None of these options affect your defensive positioning. That is a separate layer. Late in the FC26 cycle, Counter-Attack and Balanced are the most common Team Tactics in higher divisions.
- Defensive Approach controls what happens when you lose the ball. This is its own dropdown, not something derived from your Team Tactic choice. Balanced is the baseline. Your team drops into shape at a moderate speed and presses selectively. Deep pulls everyone behind the ball and looks to absorb pressure. Press After Possession Loss commits players to recover the ball immediately for a few seconds after you lose it. High Press pushes your defensive line up aggressively and triggers pressing behavior across the team. A 4-3-2-1 with High Press and a 70+ line height creates a suffocating pressing setup. That same formation with Deep and a 45 line height plays like a completely different system. Pick based on your risk tolerance.
- Line height. The single most important number on your tactics screen. Between 55 and 65 is where most competitive players settle. Going higher than 70 triggers an automatic high defensive line that compresses the space between your midfield and defense. The lines get tighter and push higher up the pitch. The real risk above 70 is getting caught by through balls over the top, not gaps between your midfielders and defenders. If you are running a high line, your CDMs need a Holding or Deep-Lying Playmaker role with Defend focus to protect against those balls in behind.
The most common tactical mistake is mismatching defensive approach with your formation. A 4-4-2 with High Press and a 72 line height can work well because the two banks of four provide structural cover. That same defensive approach on an open formation like a 4-2-4 will leave you completely exposed. Match your defensive approach to your formation's structural strength.
Player Roles: Where Fine-Tuning Actually Happens
Player Roles and Focus settings have been the standard for two years. The old individual instruction toggles like Stay Back While Attacking and Cut Passing Lanes are gone. Their functions are now distributed across Role and Focus combinations. Understanding which combination maps to your intended behavior is where tactical fine-tuning lives:
- Fullbacks. The Fullback role with a Defend focus keeps them positionally disciplined. If you want one fullback to provide width in attack, set them to Wingback or Attacking Fullback with a Balanced focus. If you leave your fullbacks on the default role without adjusting the focus, they may push forward more than you expect. Check every role individually before you start playing.
- CDMs. Holding role with Defend focus is the safe choice. This keeps them central and conservative, screening your back line and stepping in to intercept. If you are using a formation with two CDMs, you can set one to Holding with Defend and the other to Deep-Lying Playmaker with Balanced focus for a mix of defensive cover and build-up support. The old Cut Passing Lanes and Cover Center behaviors are now baked into the Holding role's Defend focus.
- CAM. The role choice here changes your attack more than any other position. Shadow Striker with Attack focus pushes your CAM forward aggressively, essentially playing as a second striker. Playmaker with Balanced or Roam focus drops them deeper to collect the ball and create. If your striker is getting isolated, switching your CAM from Shadow Striker to Playmaker can fix your connection between midfield and attack without changing your formation.
- Strikers. Advanced Forward with Attack focus is the standard for pace-oriented players. Target Forward with Attack focus suits hold-up play. The important detail: if you set your striker to Advanced Forward and they have low pace, the role will waste their abilities because they will constantly try to run in behind and lose the footrace. Match the role to the player's attributes, not to what the meta says.
One more thing about roles that the game does not explain well. If you set a role to Roam focus, the player will drift from their position to find space. That can be useful for a wide player who keeps getting marked out of the game. But if every player in your front four has Roam focus, your attacking shape collapses into a cluster and you lose passing options. Mix focused roles with roaming roles to keep your shape readable.
Late-Cycle Meta: The Futties Reality
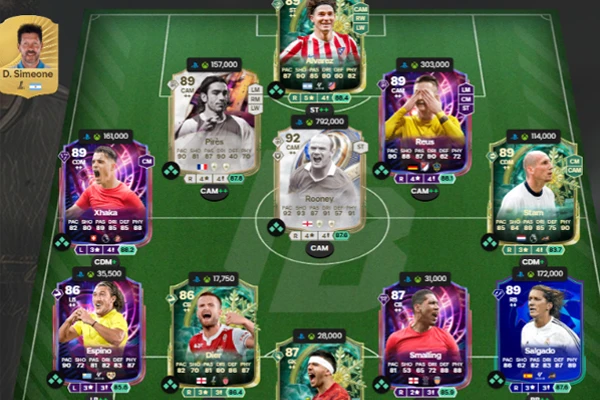
We are past the point where patches change the game. The final major gameplay update for FC26 dropped months ago. What matters now is that it is July. Every team in Division 2 and above is running a Futties-level squad of 99-rated players. When every card has max pace, max shooting, and max dribbling, the things that separated cards earlier in the cycle no longer exist. There is no this player has 92 pace and this one has 88 pace anymore. Everyone has 99 pace with a chemistry style.
At this stage of the cycle, the only meaningful differentiator between cards is Role++. A player with Shadow Striker++ will make different runs and position themselves more intelligently than the same player on Shadow Striker+ or base Shadow Striker. The Role++ bonus gives a significant boost to positioning and decision-making that flat stats alone do not replicate. When every card is juiced, Role++ becomes a bigger factor than which specific player you pick. The 4-2-3-1 narrow remains the most popular formation at the top level for this exact reason. The three CAMs and CDM pairing provide Role++ coverage through the center of the pitch.
The 4-4-2 flat has held up well because both strikers and both CMs are positions that consistently have good Role++ coverage in the Futties pool. The 4-3-2-1 is more Role-dependent. If your RF and LF have strong Role++ in their wide positions, it works. If they do not, the formation loses its edge regardless of how good your tactics are.
The Difference Between a Good Setup and a Great One
Everyone chasing the meta can copy a formation and assign the standard roles. That gets you to a baseline. What separates players who stay in one division from those who climb is knowing when to adjust during the game. If your opponent is pressing high and your build-up gets smothered, switching your Team Tactic from Short Pass to Counter-Attack mid-match changes how your front players run when you win the ball. It does not change your defensive posture. That is handled separately by your Defensive Approach setting. If you want to sit deeper while still countering, drop your Defensive Approach to Deep. If you want to keep pressing and counter, leave it on Press After Possession Loss. The two layers work independently.
If your striker keeps losing footraces on Advanced Forward, switching them to Target Forward changes their movement without changing your formation. If your CAM keeps drifting out of the play, checking whether they have Role++ at Shadow Striker or whether a Playmaker role would fit better is more productive than blaming your formation. Start with a setup that fits your playstyle. Play ten games without changing anything. You will learn exactly where the gaps are. Then adjust one thing at a time. That is how you build a tactic that is yours, not a carbon copy of a pro's setup that falls apart the moment your opponent plays differently.


