












العربية


Guide
POE2 Flask and Charm Setup Guide




People switching over to POE2, eight out of ten of them go looking for a Quicksilver flask first. They can't find it, and then they just stand there confused. We played the first game for years, and there were always a few utility flasks sitting in the belt, hit a button and the effect kicks in, that muscle memory is completely useless in the sequel. POE2 rebuilt the entire flask system. You only have two slots now, life and mana, and the utility flasks are gone, replaced by charms. I didn't take it seriously at first either, until I got frozen in the endgame and died across several maps in a row. Then I actually sat down and figured it out. This is everything I learned, and if you're coming from the first game, it'll save you a lot of stumbling.
There are only three things now, don't build on old habits
A lot of people trip right at the start because they don't realize the slot structure changed, and they keep planning their flasks the old way.
- Life and mana flasks are the only two permanent slots. All those utility flasks from the first game, Quicksilver, Granite, and the rest, simply don't exist in POE2. You won't find them in shops or in drops no matter how hard you look. So stop treating utility flasks as the core of your plan, and get those two basic flasks sorted out first.
- The utility flask's job now belongs to charms. Charms hang on your belt, they don't take up flask slots, and instead of pressing a button they trigger automatically when a condition is met. I'll get into that separately later. For now just remember one thing: there's no "press a button for a speed boost" anymore.
Once you understand this structural change, the rest of the setup starts to make sense. The "mash flasks nonstop" habit from the first game has to go entirely, otherwise you'll keep getting wrecked in the early game and blame yourself for it.
Life and mana flasks, upgrading matters more than the build
These two basic flasks are simple. Don't overthink the combination, just keep trading up to a higher tier.
- The flask's tier determines how much it recovers. Going from low to high it's Lesser, Medium, Greater, Grand, and beyond that Giant, Colossal, and so on. Early on, if you see a higher tier flask in a shop, buy it and swap it in. It's more value than almost anything else.
- That recipe-based flask upgrading from the first game is gone. In POE2 you can't combine three low flasks into a higher one, you can only get better flasks from monster drops or buy them from vendors. So every time you reach a new area, give the vendor inventory a quick scroll, there's usually something good there. In act one there's a cauldron over in Grelwood with a medium life flask and a medium mana flask tucked inside, a free upgrade if you know to look.
- Quality and modifiers are a later thing. Glassblower's Baubles raise quality and boost recovery; an Orb of Transmutation turns a white flask blue, and an Orb of Augmentation adds a modifier. Early on your resources are tight, so don't throw currency at flasks yet. Wait until your flask tier has settled.
Life and mana flasks look simple, but a lot of new characters hit a wall because they're still running around with a few low-tier old flasks. When the recovery can't keep up and one potion won't save you in a boss fight, even the best charm can't fix it. Trade up your flask tier first. That's the step everyone forgets.
A well-chosen charm really can save your life
Charms are almost entirely defensive, and they trigger automatically. Used right, they're like picking up several free layers of protection.
- Resistance charms are the most practical for filling gaps. Ruby, Sapphire, and Topaz charms each give 25% of their respective resistance for 4 seconds when you take a hit of that damage type. During the campaign when your resistances aren't capped, carrying one charm matched to the current map's damage type pays off immediately.
- Immunity charms are what stop sudden deaths. The Thawing charm gives 3 seconds of freeze immunity when you get frozen, the Staunching charm gives 3 seconds of bleed immunity when you start bleeding, and there's a whole set covering ignite, poison, and shock. These are more targeted than the resistance charms, because the ailment is usually what actually kills you.
- Don't overlook the control charms. The Stone charm prevents stuns, and the Silver charm makes you unaffected by slows. Both are especially useful for melee or boss fights. Getting frozen, stunned, or slowed is often the reason you chain-death across three maps.
- The Golden charm is for stacking rarity. It triggers when you kill a rare or unique enemy, granting 15% increased rarity for 1 second. Carry one while you're farming gear, it's better than nothing, but don't let it crowd out an immunity charm.
There's no single right answer for charm setup, it comes down to what's killing you. Dying to freeze? Carry Thawing. Getting ground down by bleed? Carry Staunching. Missing resistances? Carry the elemental charm. The point is to treat charms as your automatic life-support system, not decoration. Carry whichever one fits the map you're running.
Count the charm slots on your belt
You can't just carry as many charms as you want. The slots come from your belt, and a lot of people only realize this late.
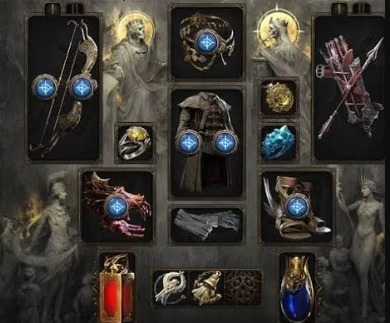
Your belt provides the charm slots, up to a maximum of 3. Ordinary belts have fewer slots, better ones open up more. So when you're swapping belts, don't just look at life and resistances, the number of charm slots matters just as much. A belt that holds 3 charms gives you a completely different defensive ceiling.
- Charms refill charges the same way flasks do. You top them up at the well in town, and you refill them by killing monsters while mapping. So charms aren't infinite either, every trigger burns a charge, and when they run out you go back to town or kill more monsters.
- Prioritize the charm that covers your cause of death. 3 slots sounds like a lot, but early on you really only have 1 or 2. Don't start off carrying a Golden charm for rarity. Make sure the life-savers like Thawing and Staunching are in first, and only consider the rest once you have room to spare.
- The belt detail is something I only figured out late myself. I didn't pay attention to charm slots at first, grabbed three good charms, then realized I could only equip one. That stung. So when you look at a belt, don't just stare at the numbers. Count its charm slots first, because that's what determines the ceiling of your whole defensive setup.
Flasks were part of your gameplay in the first game, and the fast players mashed them nonstop. In the sequel, they're more like a defensive structure you plan out ahead of time. The two flasks handle your sustain, the charms automatically bail you out at your most dangerous moment, and the belt decides how many of those safety nets you can carry. Get these three sorted out, and you'll realize a lot of those deaths that felt random were actually just a flask setup problem. After you fix it, the most obvious change isn't higher damage, it's that you die to ailments a whole lot less.


