












العربية


Gameplay
How Should You Actually Combine Engravings in Lost Ark?




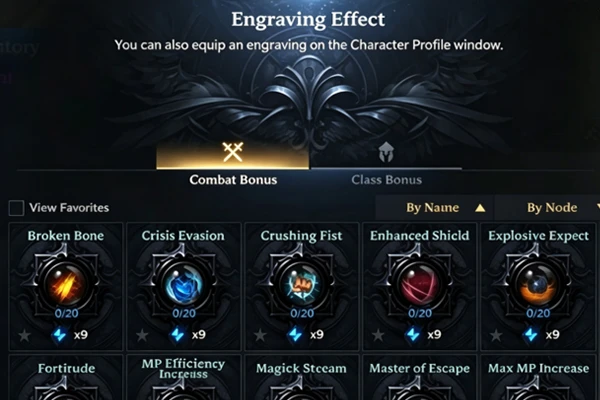
Lost Ark's engraving system looks like a pile of passive effects stacked together, but it's really a single point-allocation system running through engraving books, ability stones, and accessories. It directly decides which direction a character's damage structure gets pushed. A lot of people copy someone else's endgame setup and end up either paying way too much or getting a set of bonuses their class can't even use. Before combining engravings, think through three things first: where the nodes come from, what your class engraving is, and which general engravings fit your playstyle.
Nodes are the only conversion formula, get them straight
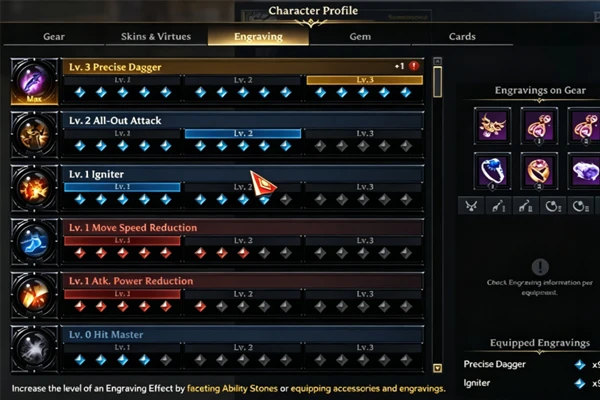
Engraving levels aren't bought directly; they're built out of nodes. 5 points equals level 1, 10 points equals level 2, and 15 points equals level 3. That's the system's only conversion standard, and every combination revolves around it.
- Engraving books come in four rarities: green, blue, purple, and gold. Each rarity needs its own 20 books to unlock that tier's nodes: green gives 3 points, blue gives 6, purple gives 9, gold gives 12. The four tiers stack, so a fully-read gold book is worth 30 points in total.
- A faceted ability stone grants each of two engravings a chunk of nodes. It's the biggest gamble, and also the most frustrating part of gearing.
- Accessory nodes are the main source: a necklace carries two engravings, earrings and rings carry one each, and higher quality means more points.
- The goal is to make every source's nodes add up so a given engraving lands on exactly 15 points; anything past that is wasted.
If the nodes don't add up, your engraving setup is always just short. Memorize the three thresholds: 5, 10, 15. After that, everything else gets easier to read.
The class engraving is the foundation, max it before anything else
Every class has two class engravings, which basically decide that class's playstyle. No matter how fancy a general engraving is, it revolves around the class engraving.
- The class engraving should almost always be maxed to level 3 first. It's the foundation of your damage structure, and without it the class's own mechanics don't even work.
- The two class engravings correspond to two builds; settle which one you're playing first, and the direction of your general engraving choices becomes clear.
- Back-attack classes can't avoid Ambush Master, positional classes lean on Hit Master, and burst classes prioritize Grudge and Keen Blunt Weapon.
- Stacking general engravings while leaving the class engraving incomplete puts the cart before the horse; the whole damage structure falls apart.
The class engraving is a requirement; general engravings are optional. The order can't be reversed.
General engravings follow your playstyle and gear, don't copy the rankings
General engravings aren't absolutely strong or weak; the same engraving pays off very differently on different classes. Copying setups off a tier list is the number one reason gearing goes wrong.
- Back-attack classes take Ambush Master, positional classes take Hit Master. The two don't really swap, and copying the wrong one is money down the drain.
- Grudge gives a big damage boost at the cost of taking more damage; if your positioning isn't there yet, hold off and swap it in later.
- Adrenaline stacks crit by landing skills, which suits fast multi-hit classes; single-hit burst classes can't stack it, so its value drops.
- Keen Blunt Weapon adds crit damage on the condition that your crit rate is already high; before crit is stacked, it's basically doing nothing.
- Raid Captain scales off attack speed and movement speed, so it's only worth it on swiftness classes; slow heavy classes shouldn't force it.
Whether a general engraving makes sense is calculated from how much it actually does on your class, not from its position on a ranking.
Pick your tier by budget, how to choose from 3×3 to 5×3
The scale of your engraving setup follows your wallet and your progress; 3×3, 4×3, and 5×3 are the three mainstream tiers. Picking the wrong one either costs you damage or wastes money.
- 3×3 (three engravings at level 3 each) is the lowest entry line: cheap, fast to finish, and enough for dailies and low-tier content.
- 4×3 is the gate for legion raids; adding one more general engraving is a clear damage gain, and it's the setup most players stay on.
- 5×3 is the current endgame target with the highest damage ceiling, but the investment in stones, accessories, and books multiplies several times over.
- 5×3+1 and 5×3+2 are for chasing the absolute limit; most players don't need to bother, since the value is extremely poor.
- For progression, lock in 3×3, build gradually toward 4×3 and 5×3; don't try to skip straight to the top.
Tiers aren't superior or inferior; it's just whether they match your progress and budget. A solid current tier beats hoarding for a 5×3 you can't finish.
The order of combining engravings is actually fixed: settle your class engraving first, then pick general engravings by playstyle, then set your tier by budget. Nodes calculated, class engraving maxed, general engravings matched to your playstyle, tier matched to your budget. Get those four steps right and the setup won't go wrong. Version numbers will change, but this combining logic won't. When you're genuinely unsure, write out the node sources for your class engraving and the mainstream general engravings and do the math yourself; it works better than any guide.


