












العربية


Guide
ARC Raiders: The Best Looting Routes for Every Map




The most common thing new players do when they first drop into ARC Raiders is run around aimlessly. They see a building and dive in, see a crate and open it, and after ten or fifteen minutes their bag is full of ammo and junk. They do the math and realize they would've been better off extracting early. But watch the veterans play, and from the moment they land they're headed in one direction, on a route that's basically fixed, and they come out ten minutes later with a bag stuffed full of blueprints and valuables. The difference isn't luck, it's the route. The maps are fixed, the high-value spots are fixed, and the gap between someone who knows where to look and someone who doesn't is several times over. Here are the looting routes I've run into the ground on each map, and the first two maps especially will save new players a lot of pain.
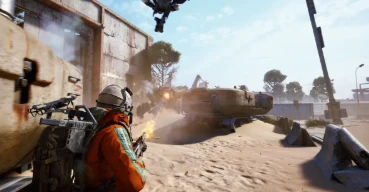
Maps unlock one at a time, so don't rush ahead
The first place people trip is not understanding the unlock order, then charging into the hardest map to get themselves killed.
- Maps unlock through your main story progression, not by counting rounds. Dam Battlegrounds is the only map by default, and Buried City, Spaceport, and the Blue Gate open up one by one as the story advances. Practice Range is for shooting drills, there's nothing to loot there. So don't expect to rush the Blue Gate on day one, the path opens as the story moves.
- Difficulty scales with reward, but new players shouldn't get greedy. Dam Battlegrounds and Buried City already have enough good loot to build a solid stash. Spaceport and the Blue Gate drop top-tier stuff, but they're crowded and dangerous. Master the first two maps first, and move up once your gear and mechanics are ready.
Getting the unlock order straight saves you a lot of pointless deaths. Plenty of new players are eager to push into late maps, but their gear isn't there yet, they get spotted by veterans the moment they land, and looting turns into feeding. Get the pace right first, and the routes only matter after that.
The first two maps, learn these two core zones
Dam Battlegrounds and Buried City are a new player's main arena, and their high-value spots are actually pretty concentrated.
- The richest spot on Dam is the Hydroponic Dome Complex. It sits top-left, and together with the Control Tower and the Research & Administration Building, it's the most worthwhile area to loot on the map. The line I usually run goes like this: start at Formicai Outpost, pass the water tower, head straight for the Hydroponic Domes, then swing to the Electrical Substation, and extract through the Raider's Hatch. Eight to twelve minutes, and the returns are steady.
- Don't skip the Raider Caches on Dam. The western warehouse complex, Old Battlegrounds, the floodgate, and the substation are all high-density cache zones. These chests have the highest chance of dropping weapon blueprints, so open them first, they're worth far more than ordinary ammo boxes.
- On Buried City, prioritize the Space Travel hub and the Hospital. The sixth floor of the Space Travel building, Town Hall, the hospital roof, and the parking garage basement are all loaded. This map has a lot of verticality, so learning to work the floors and corners beats sweeping it flat.
On these two early maps, it comes down to mastering two core zones, the Hydroponic Domes and the Space Travel hub, plus the caches along the way. Once your route is locked in, you'll notice each raid's returns get noticeably more consistent, and you'll stop having those runs where you wander for half an hour and come out with nothing.
The gold rooms on Spaceport and the Blue Gate are worth the risk
The late maps drop top-tier loot, but they're also the most dangerous, so you have to pick your spots.
- The richest room on Spaceport is the Staff Room in the Departure Building. The left side of the map holds the Departure Building, the Arrival Building, and the Launch Towers, while the right holds Control Tower A6 and Container Storage, but the Staff Room in Departure is the room everyone agrees is best. The Orbital Docking Stations need a blue keycard, and the main hangars are lootable too, just with a lot of PvP risk.
- On the Blue Gate, Pilgrim's Peak and the central Checkpoint have the best loot, but also the most traffic. If you want something safer, hit the Security Wing, the Red Room with that battery puzzle, the Maintenance Wing, and the Portal Chamber. There's a Reinforced Reception route that can sweep the good stuff in about five minutes when nobody's contesting it.
- Get your cache priority straight. Weapon cases and blueprint boxes always come first, medical bags and grenade cases second, buried caches third, and regular field crates and ammo boxes last. Once you're in a high-danger zone, grab only the first two tiers and leave, don't get greedy.
The late maps are all about getting in and out fast. You don't need to clear the whole map. Sweep the fixed points, the gold rooms and caches, and your returns already crush what you'd get wandering the early maps. The key is deciding where you're going before you load in, not making it up once you're already there.
The players who know how to loot watch the weather
Some weather conditions push cache output up a whole tier, and the players who read them queue specifically for those raids.
- Hurricane weather is the richest time to loot. It spawns a wave of special caches, which players call First Wave Caches, with blueprint drop rates up to fifty or sixty percent, and they drop rare blueprints like Tempest, Bobcat, and Vulcano. These crates give off a rhythmic electric hum, sit shallow in the ground, and show a red icon within twenty meters. On Dam, the Testing Annex and the Controlled Access Zone are dense, and on Buried City, Town Hall Plaza and Marano Park are the hotspots during a hurricane.
- The naked run is the most painless farming method. The catch is you need an Augment loadout, because the Free Loadout has no Safe Pocket. Drop in with nothing but Adrenaline Shots, sprint straight to the cache clusters, stuff the blueprints into your Safe Pocket, then surrender on the spot. That way you skip the extraction entirely. A run takes under five minutes, and you can pull half a million credits an hour or more. When you're short on money early on, this is especially useful.
- Cold Snap and Night Raid are worth watching too. Cold Snap noticeably raises blueprint drop rates, and Night Raid has more keys and better locked-room loot. When you see either of these conditions, bring keys and lockpicking tools with you.
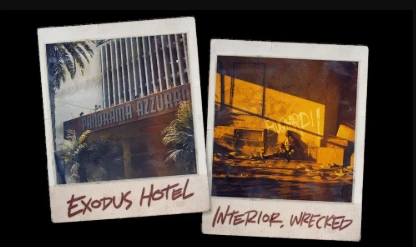
- Don't wander into the special maps. Stella Montis is a purely indoor map, recommended for level 25 and up, and hurricanes never spawn on it. Riven Tides is the newest coastal map, heavy on verticality, with the hotel and the Port Authority Building as its core zones. Until you know these two maps, don't make them your money-farming mains.
The weather layer is something a lot of players miss even after hundreds of hours. The same map can pay out several times more in a hurricane raid than a normal one, but if you load in without checking the conditions, you're throwing that chance away. Learn to read the weather, the spots, and the routes, and looting finally stops being a gamble and becomes a system.
The core of looting was never your reflexes, it's the route. The maps are fixed, the spots are fixed, and the caches that drop the good stuff are fixed too. The only thing you have to do is run that fixed information until it's muscle memory. Early on, get your base routes down on Dam Battlegrounds and Buried City, then stretch into Spaceport and the Blue Gate once your gear is ready, and switch to hurricane raids when the weather's right for blueprint farming. The day you land without hesitating and beeline straight for your first spot, you'll realize the same playtime is paying out several times more. This game doesn't reward who kills the most, it rewards who walks out carrying something, and knowing how to loot is the prerequisite for walking out at all.


